Contents
Introduction
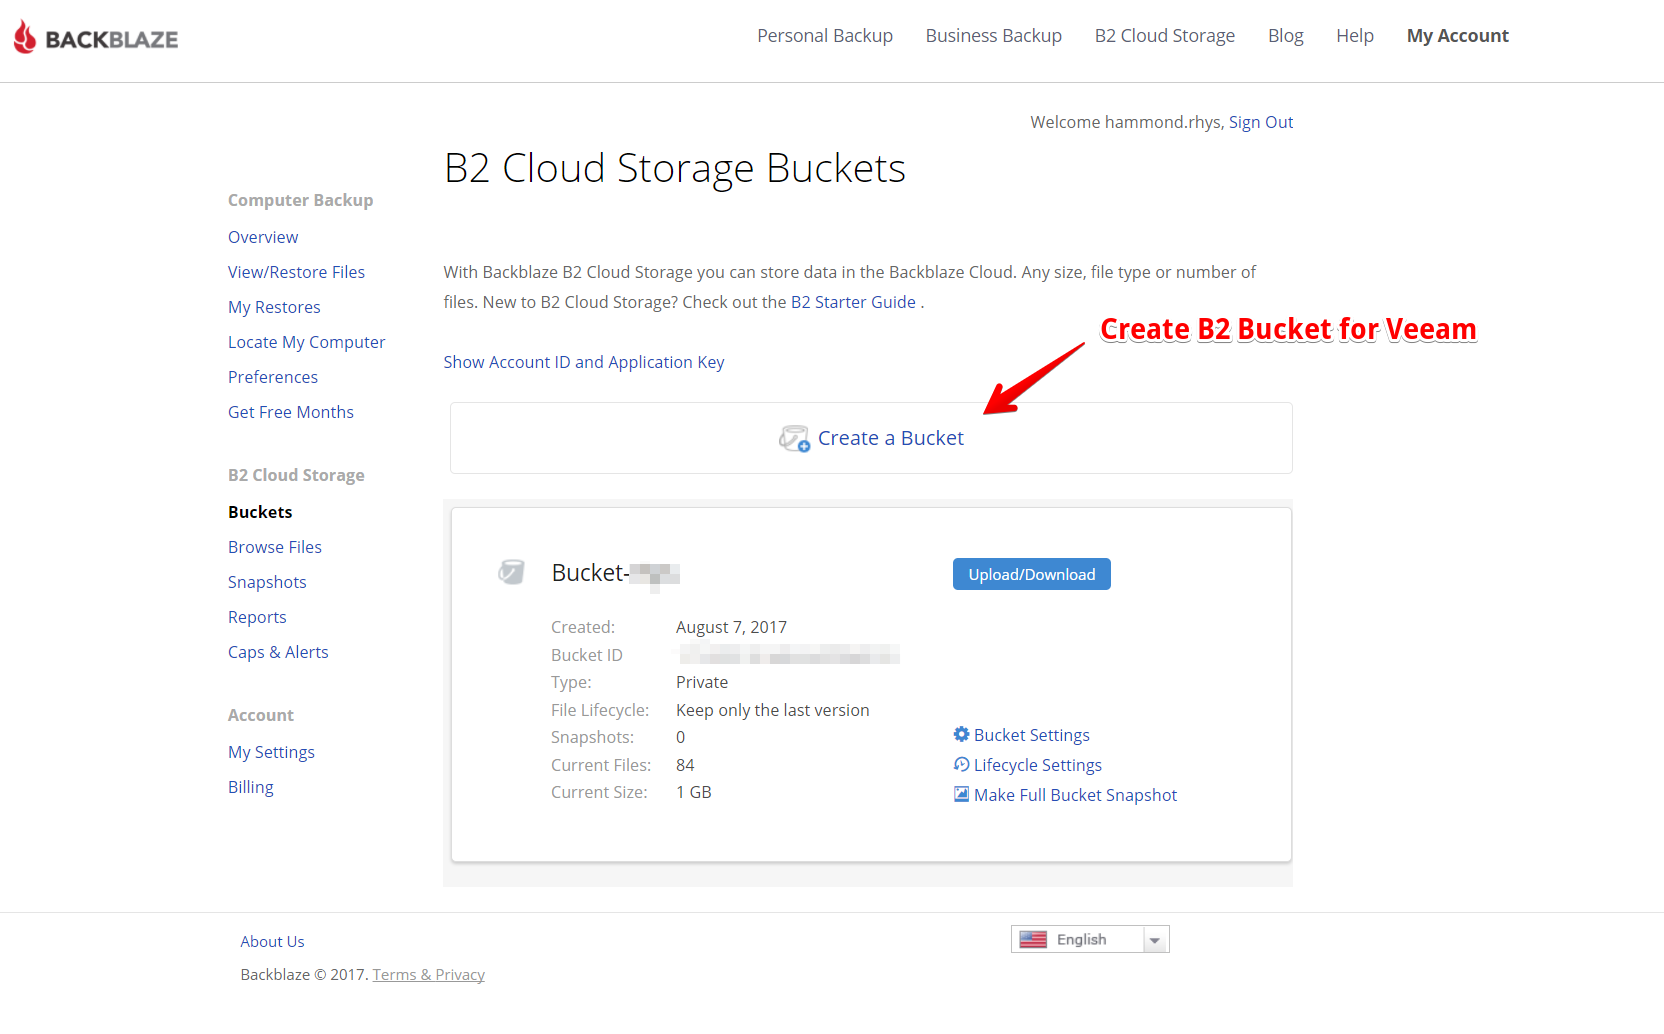
Phase 1 – Create the Backblaze B2 Bucket
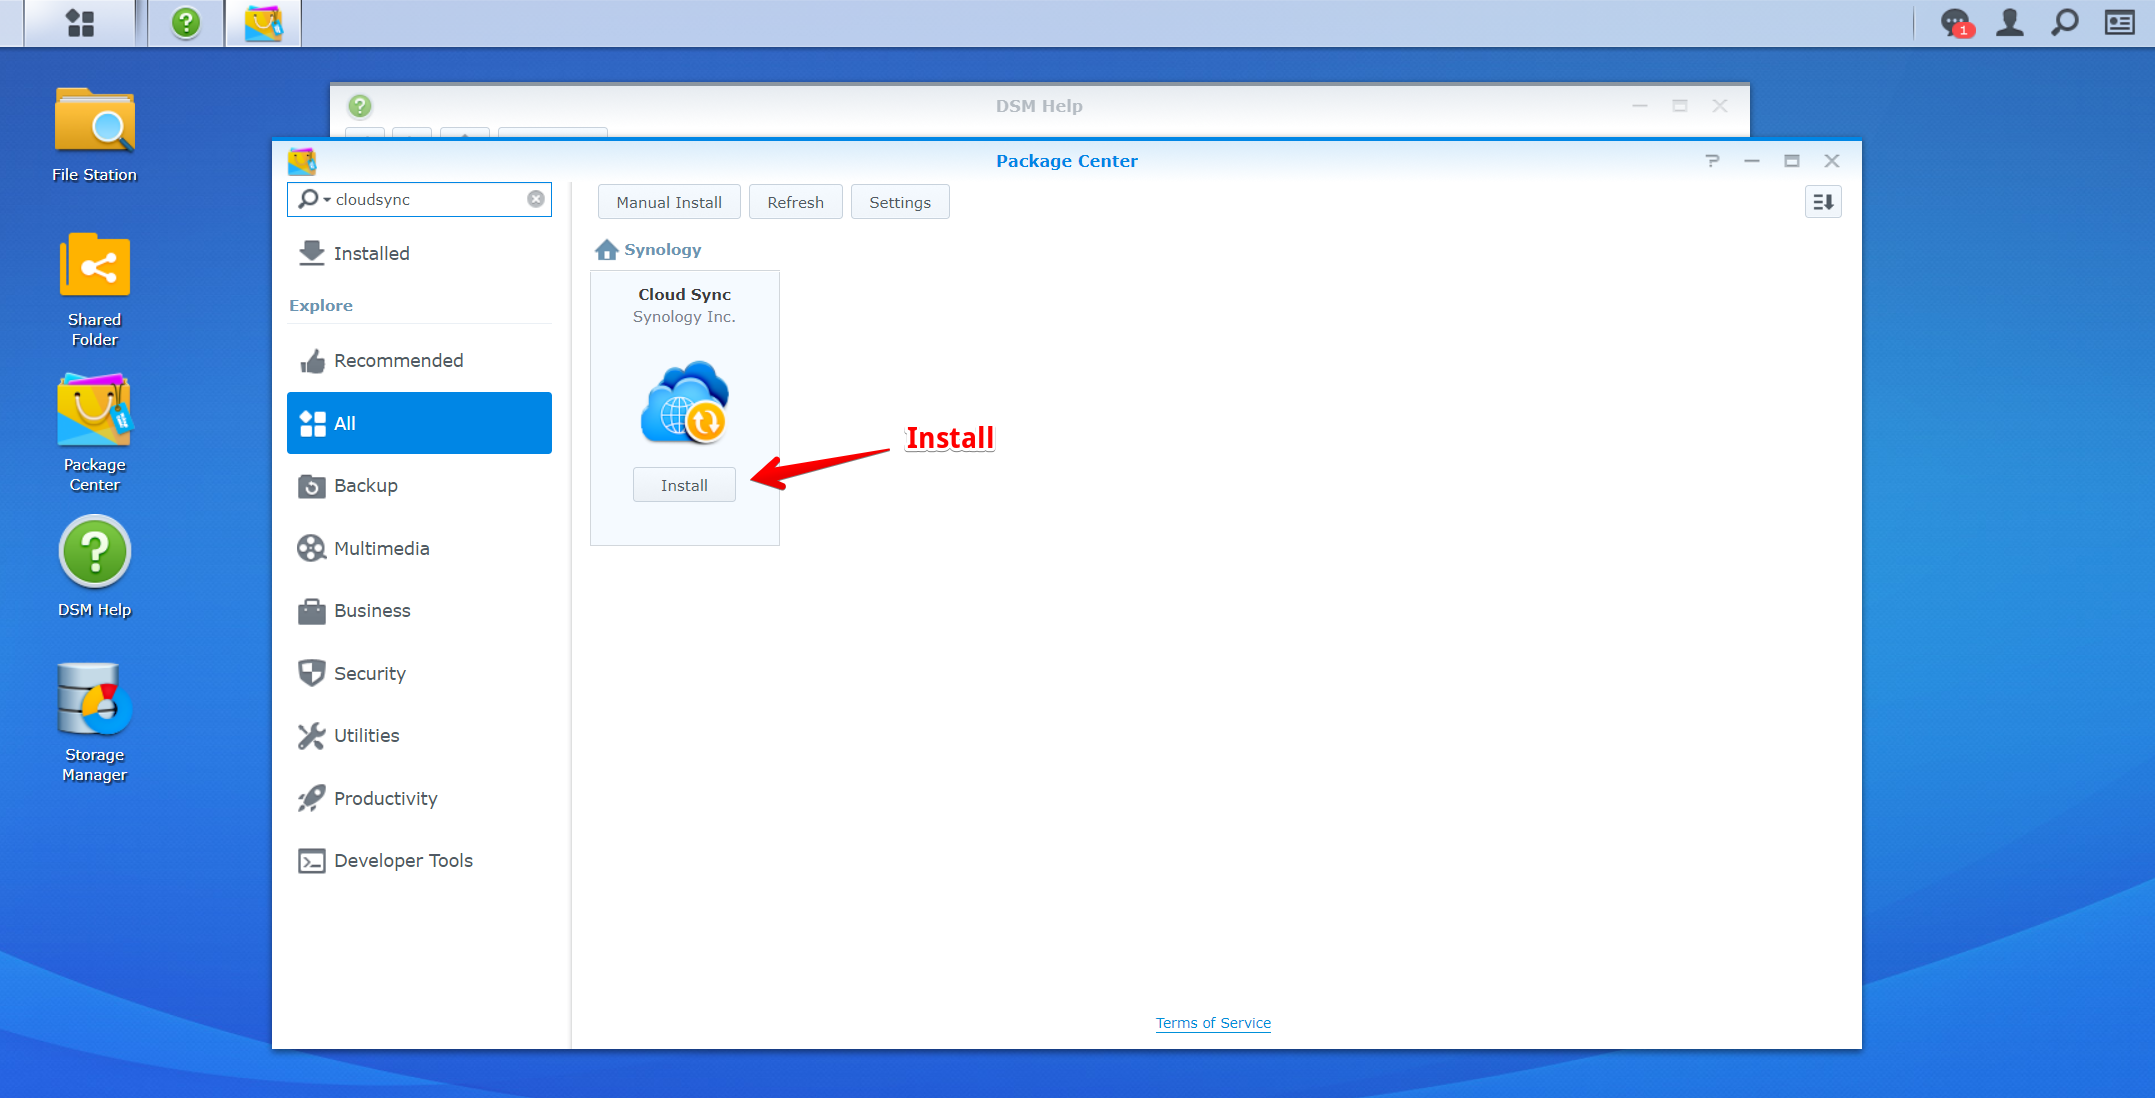
Phase 2 – Install and Configure Synology CloudSync
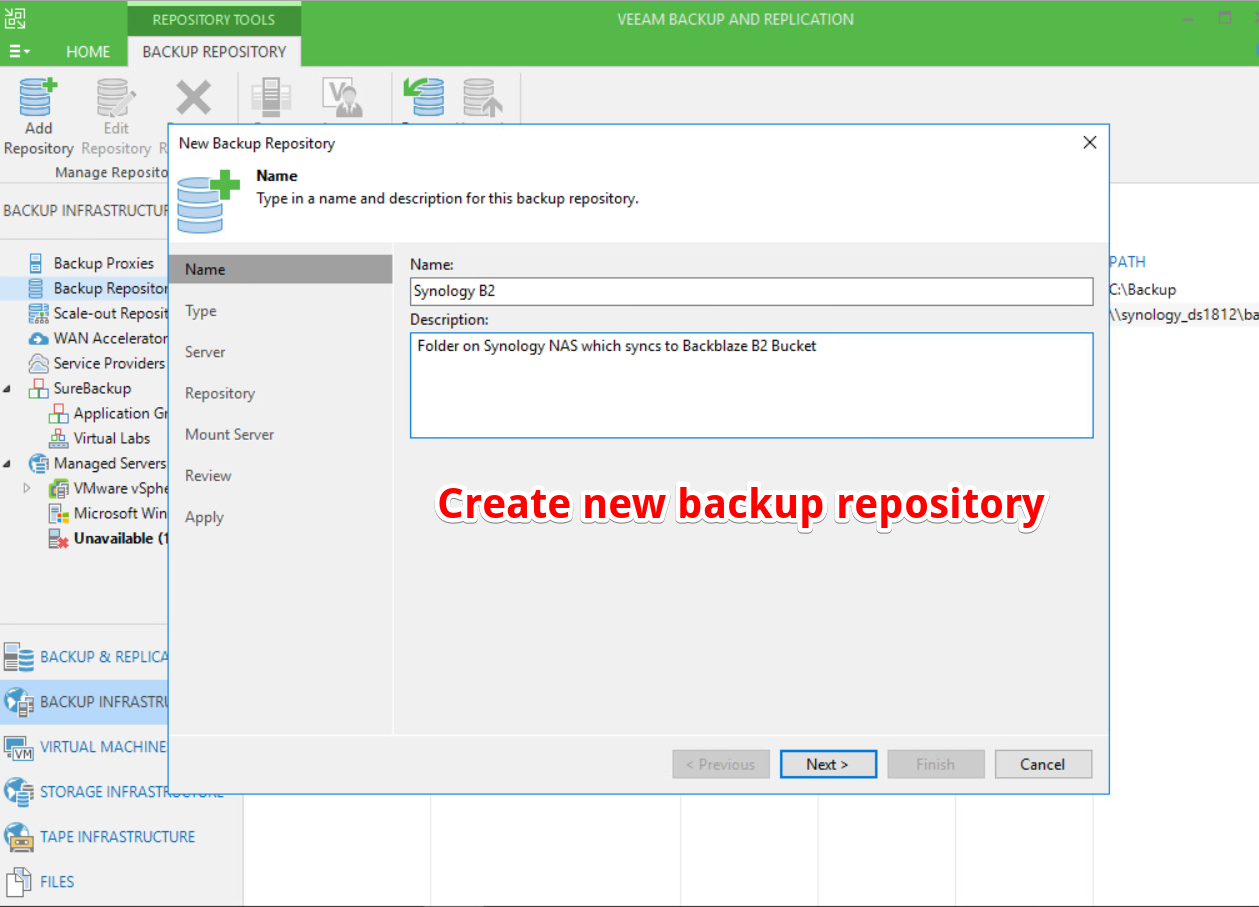
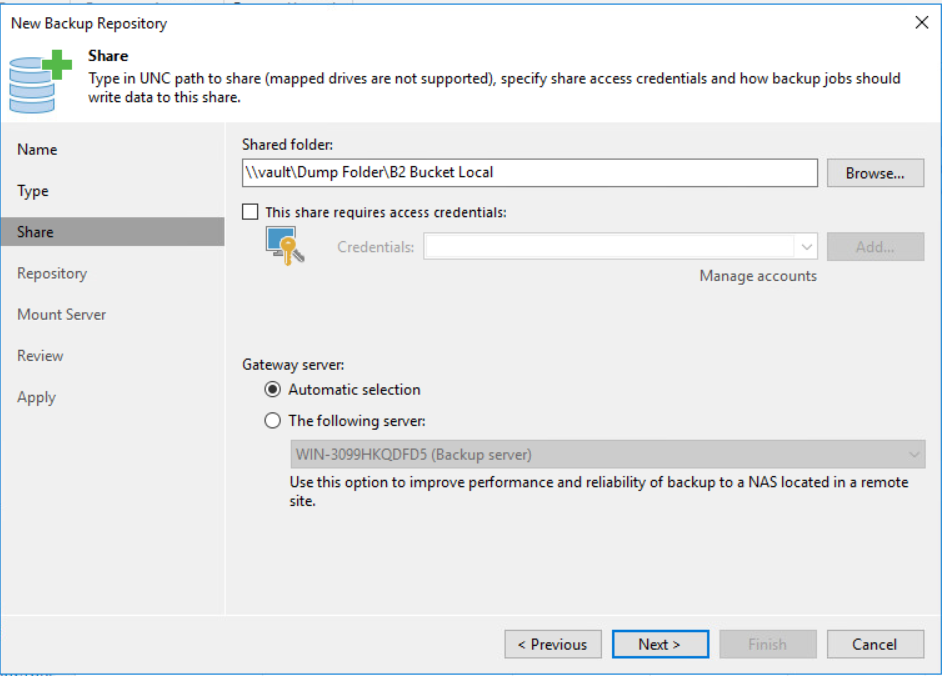
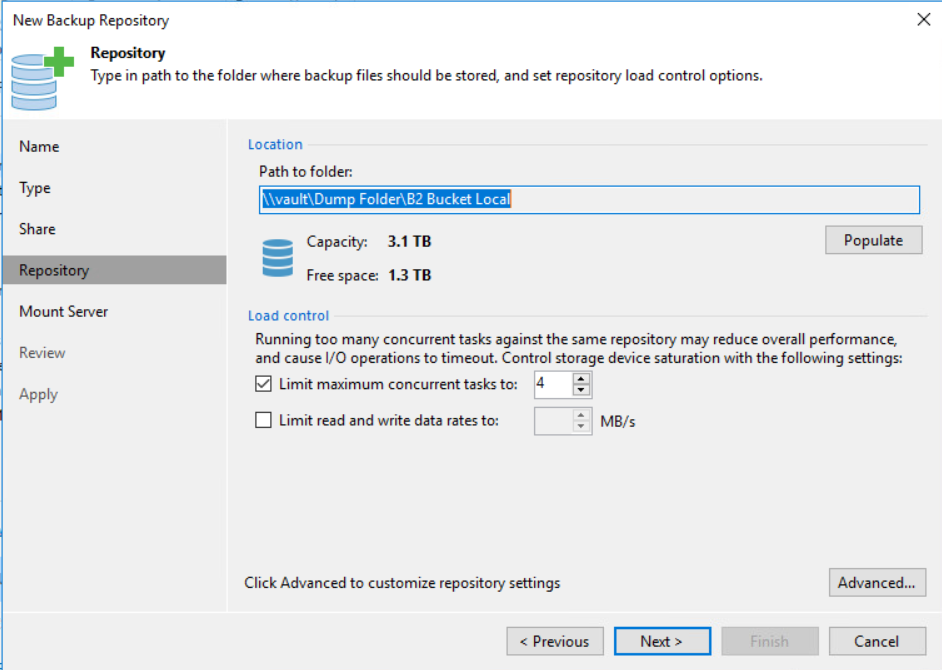
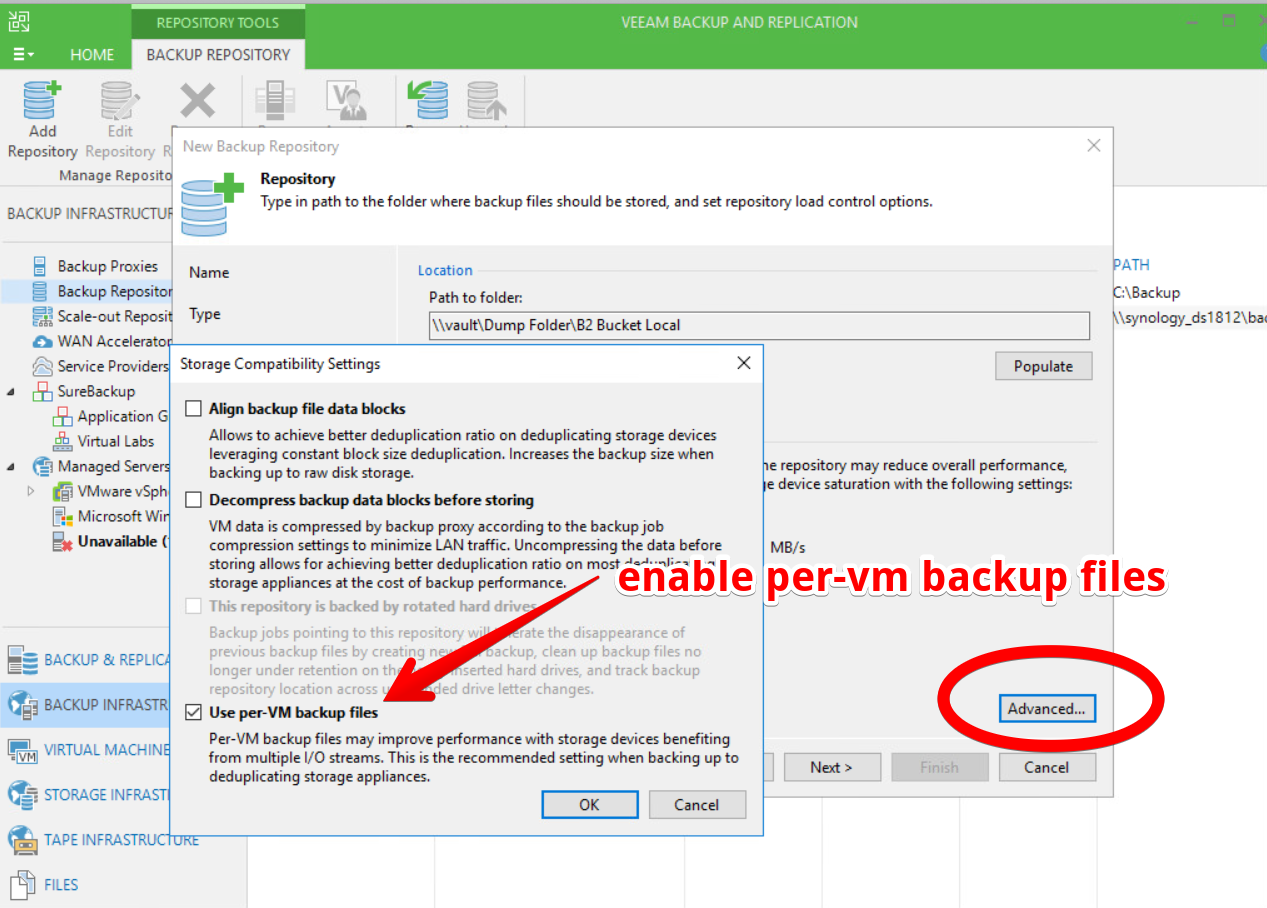
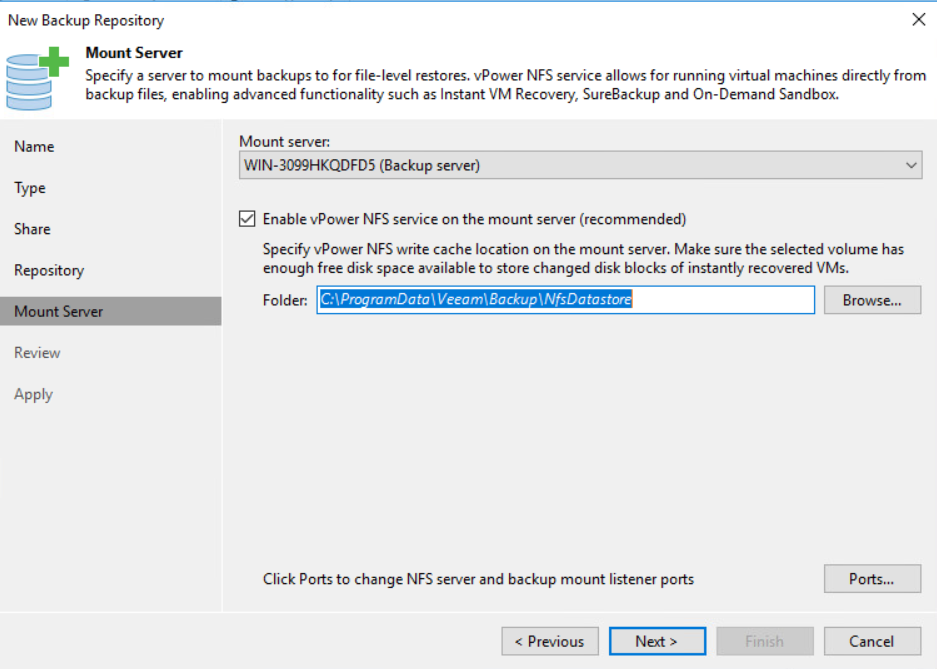
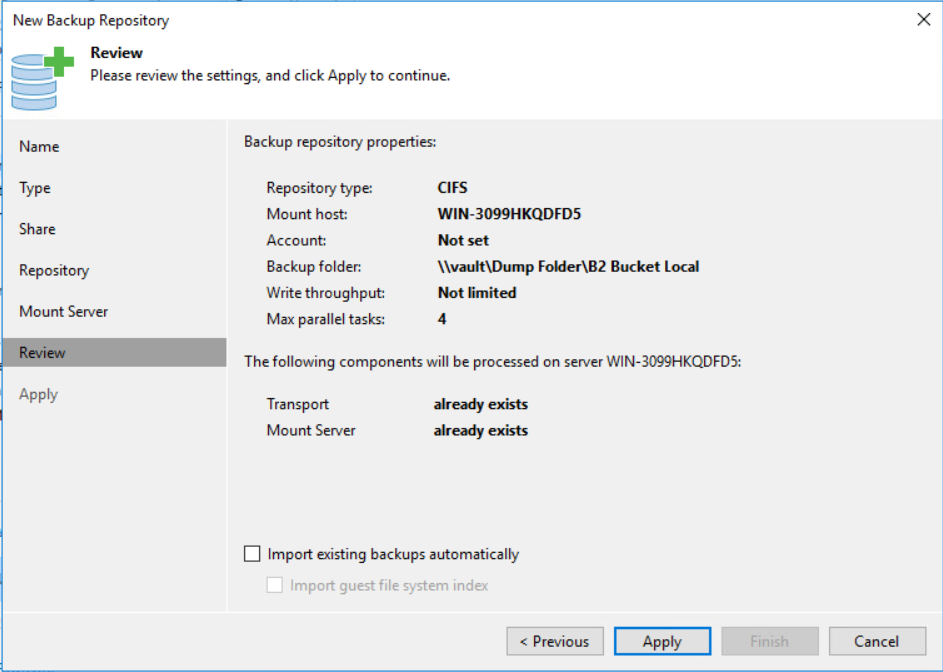
Phase 3 – Configure Veeam Backup Repository
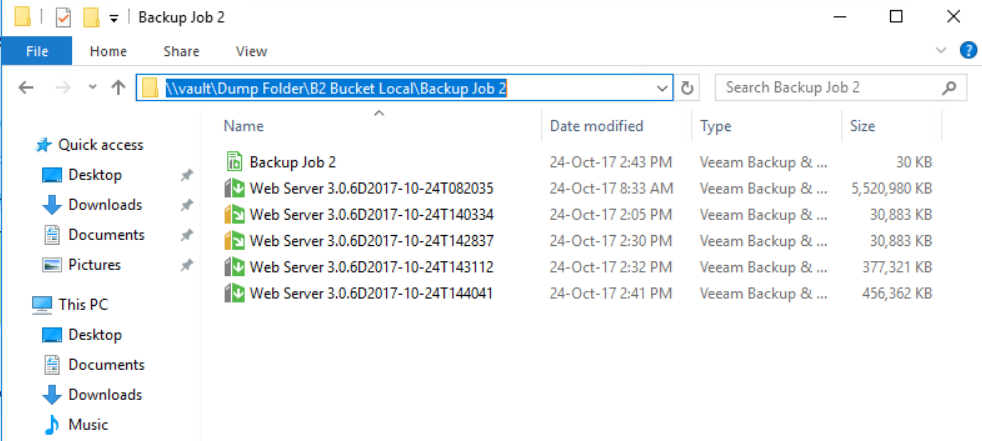
Phase 4 – Create the Veeam Backup Job
Phase 5 – Testing and Tuning
Summary
Introduction
B2 Cloud Storage is an object storage service offered by Backblaze that enables users and organisations to upload files to their heart’s content billed on a per monthly basis using a pay for what you consume model. Backblaze has evolved this object storage service ‘B2’ out of the already successful $5 a month unlimited backup plan which was built from the ground up using Storage Pods. Storage pods are designed in-house by Backblaze, leveraging consumer grade hardware and hard drives in a purpose-built chassis designed to minimise costs, reduce footprint and yield the best dollar per GB possible. For example, using 4TB drives, they can achieve a cost per GB as low as $0.036.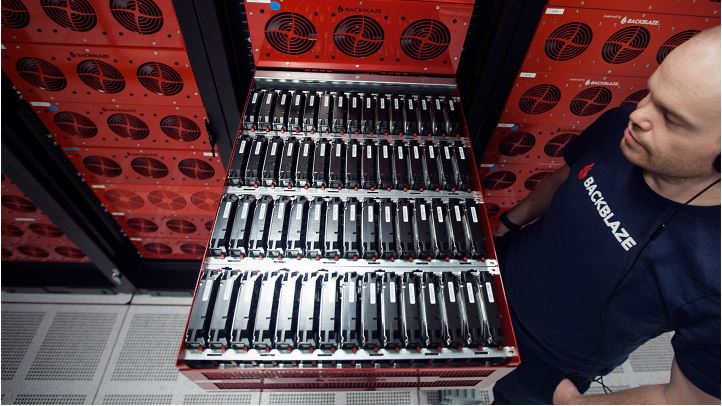
These Backblaze pods, which are now up to revision 6, are literally filled to the brim with hard drives, over 60 of them in fact in a 4U chassis. I recommend that you go and check out more on these awesome units here.
So, Backblaze takes these Storage Pods a step further for B2, by grouping 20 at a time into a Backblaze Vault it enables them to optimise reliability and durability of the entire system.