Phase 3 – Configure Veeam Backup Repository
Now the fun part, configuring the Veeam Backup Repository.
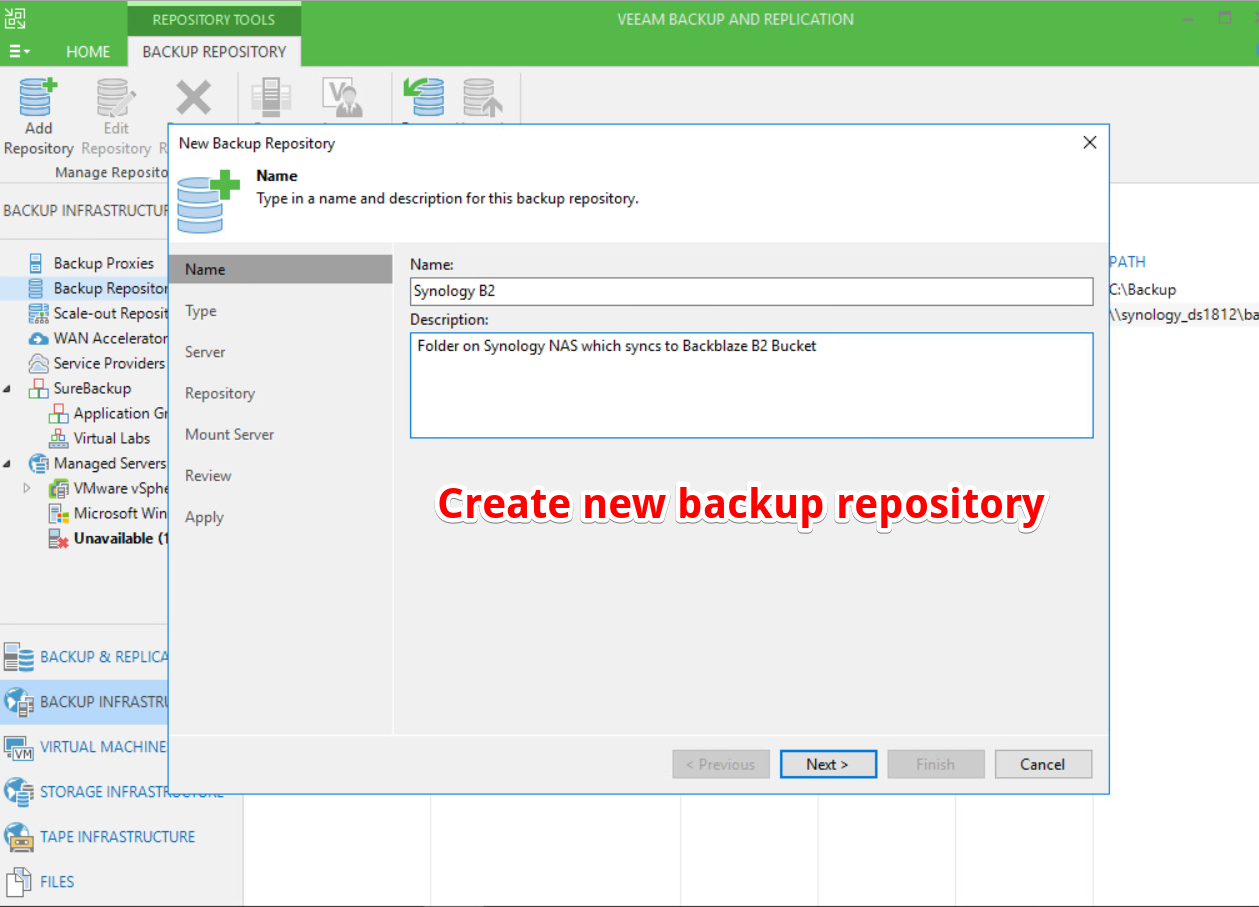
I’m going to assume this is an existing Veeam Backup & Replication server that has already been configured for the most part. So to begin, we need to open up the Veeam Backup & Replication console and create a new Veeam backup repository. I’ve given mine the name ‘Synology B2’ but I recommend you enter a description that is fit for purpose.
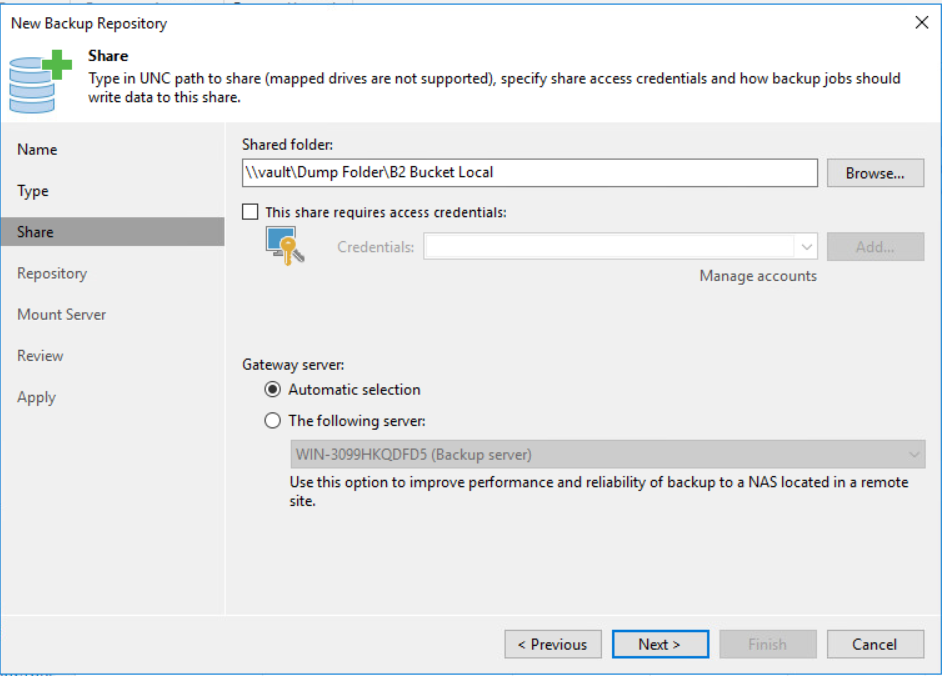
Because our Synology CloudSync is configured to use an SMB shared folder, we will be configuring a ‘Shared folder’ Veeam Repository.

Type in the UNC path of our SMB share, be sure to use to define the same folder that we configured CloudSync to use. In my case, my shared folder does not require any credentials but for any production environment, I strongly recommend you lock down the share with credentials. The risk of accidental or even malicious file deletion is a real risk and steps should be taken to minimise the likelihood of it happening.
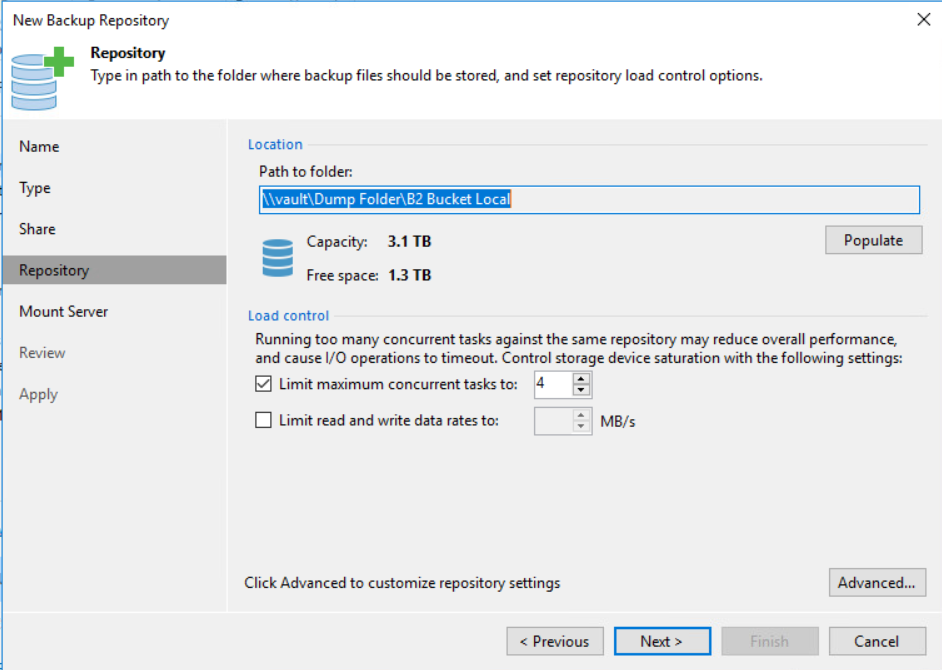
Clicking next we are greeted with load control and advanced options, I’m happy to leave the load control as default but for a production environment we should size the concurrent tasks in line with Veeam Best Practices. Note: https://rhyshammond.com/max-concurrent-tasks-veeam-br/
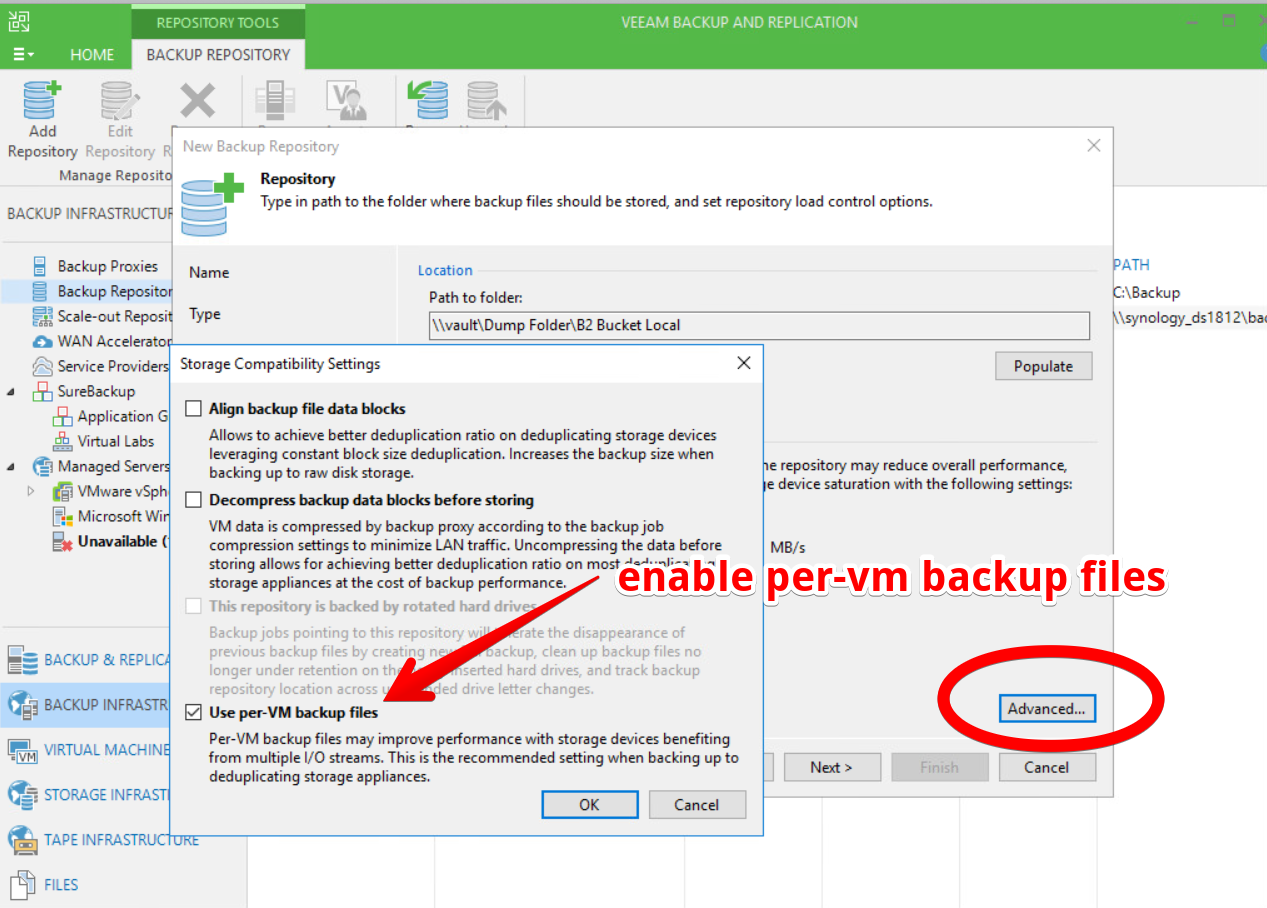
There a couple options we should consider changing on the Veeam Backup Repository to help improve performance and reliability especially considering we are leveraging Synology CloudSync to upload Veeam backup files into B2.
- We don’t need to enable ‘Align backup file data blocks’ as my Synology is not configured to perform de-duplication (I don’t believe it is even capable of such a feature)
- We don’t need to enable ‘Decompress backup data blocks before storing’ as again, my Synology is not configured to perform de-duplication.
- We enable ‘Use per-VM backup files’ because, without it, backup jobs that contained multiple VMs would result in a single large backup file. By enabling this option, it splits the VMs out into their own backup file. This is important as it makes uploading and download backups much more manageable.
Next, we need to choose a mount server, in my homelabs I have left this as default but considerations should be made if this is for production. Ideally, it would be a Veeam proxy that has a good connection to the repository.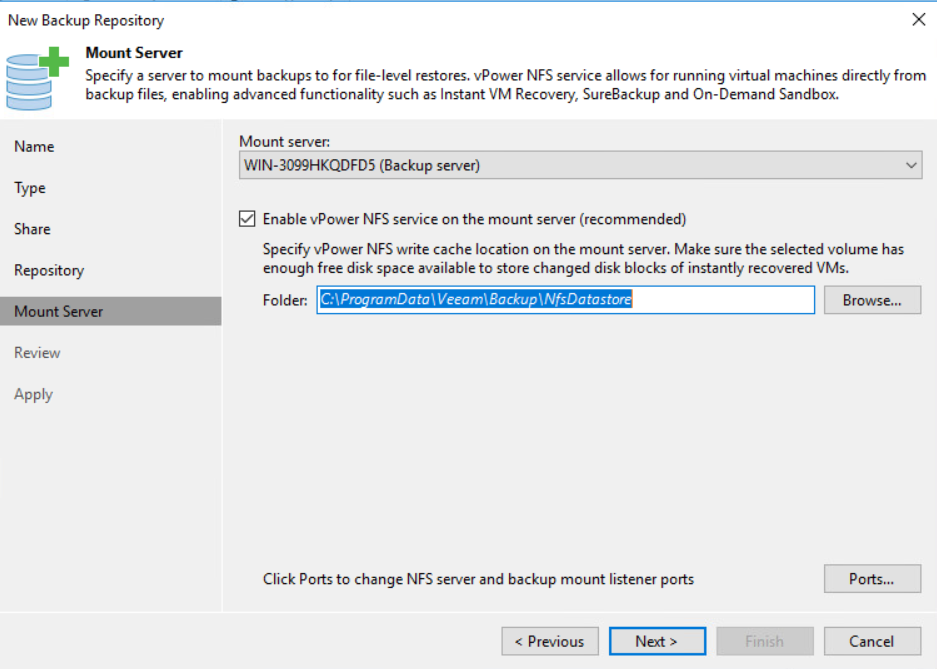
Review and finish adding the SMB Synology Shared Folder.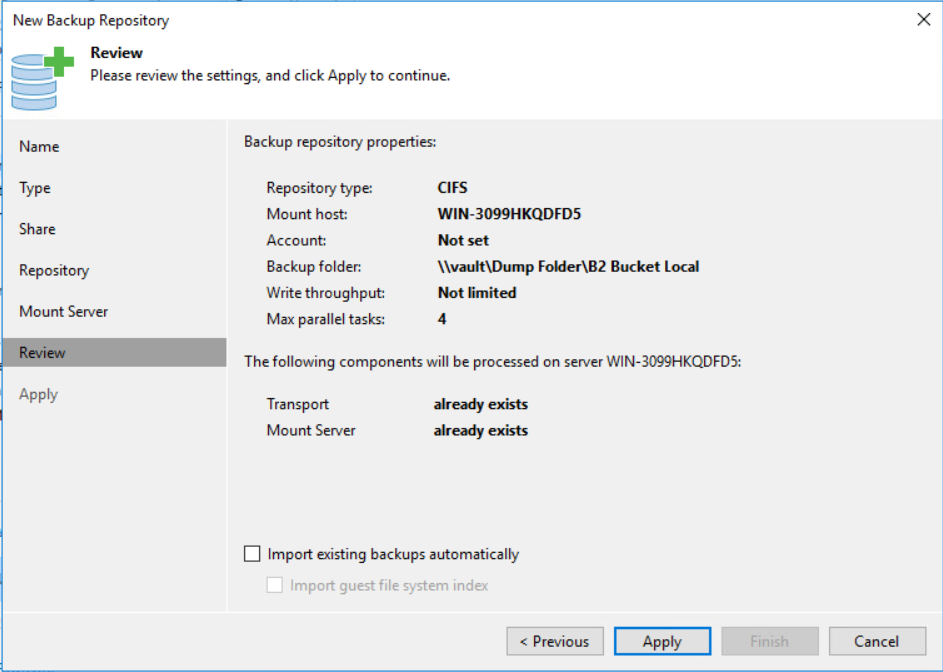
We have created a bucket in Backblaze B2 and we are now ready to proceed to Phase 4.