Phase 2 – Install and Configure Synology CloudSync
Ok, we have created a B2 bucket and we are now ready to configure our Synology NAS.
Now, in my case, I am just reusing a previously configured shared folder which is fine for my homelab testing so I’ll be going straight into installing and configuring CloudSync with B2. However, it is recommended to create a new shared folder dedicated for storing Veeam backup files and lock it down with authentication anytime you are deploying into production.
REMEMBER: It is important to size your volume correctly so that it can handle your retention policy capacity and performance requirements.
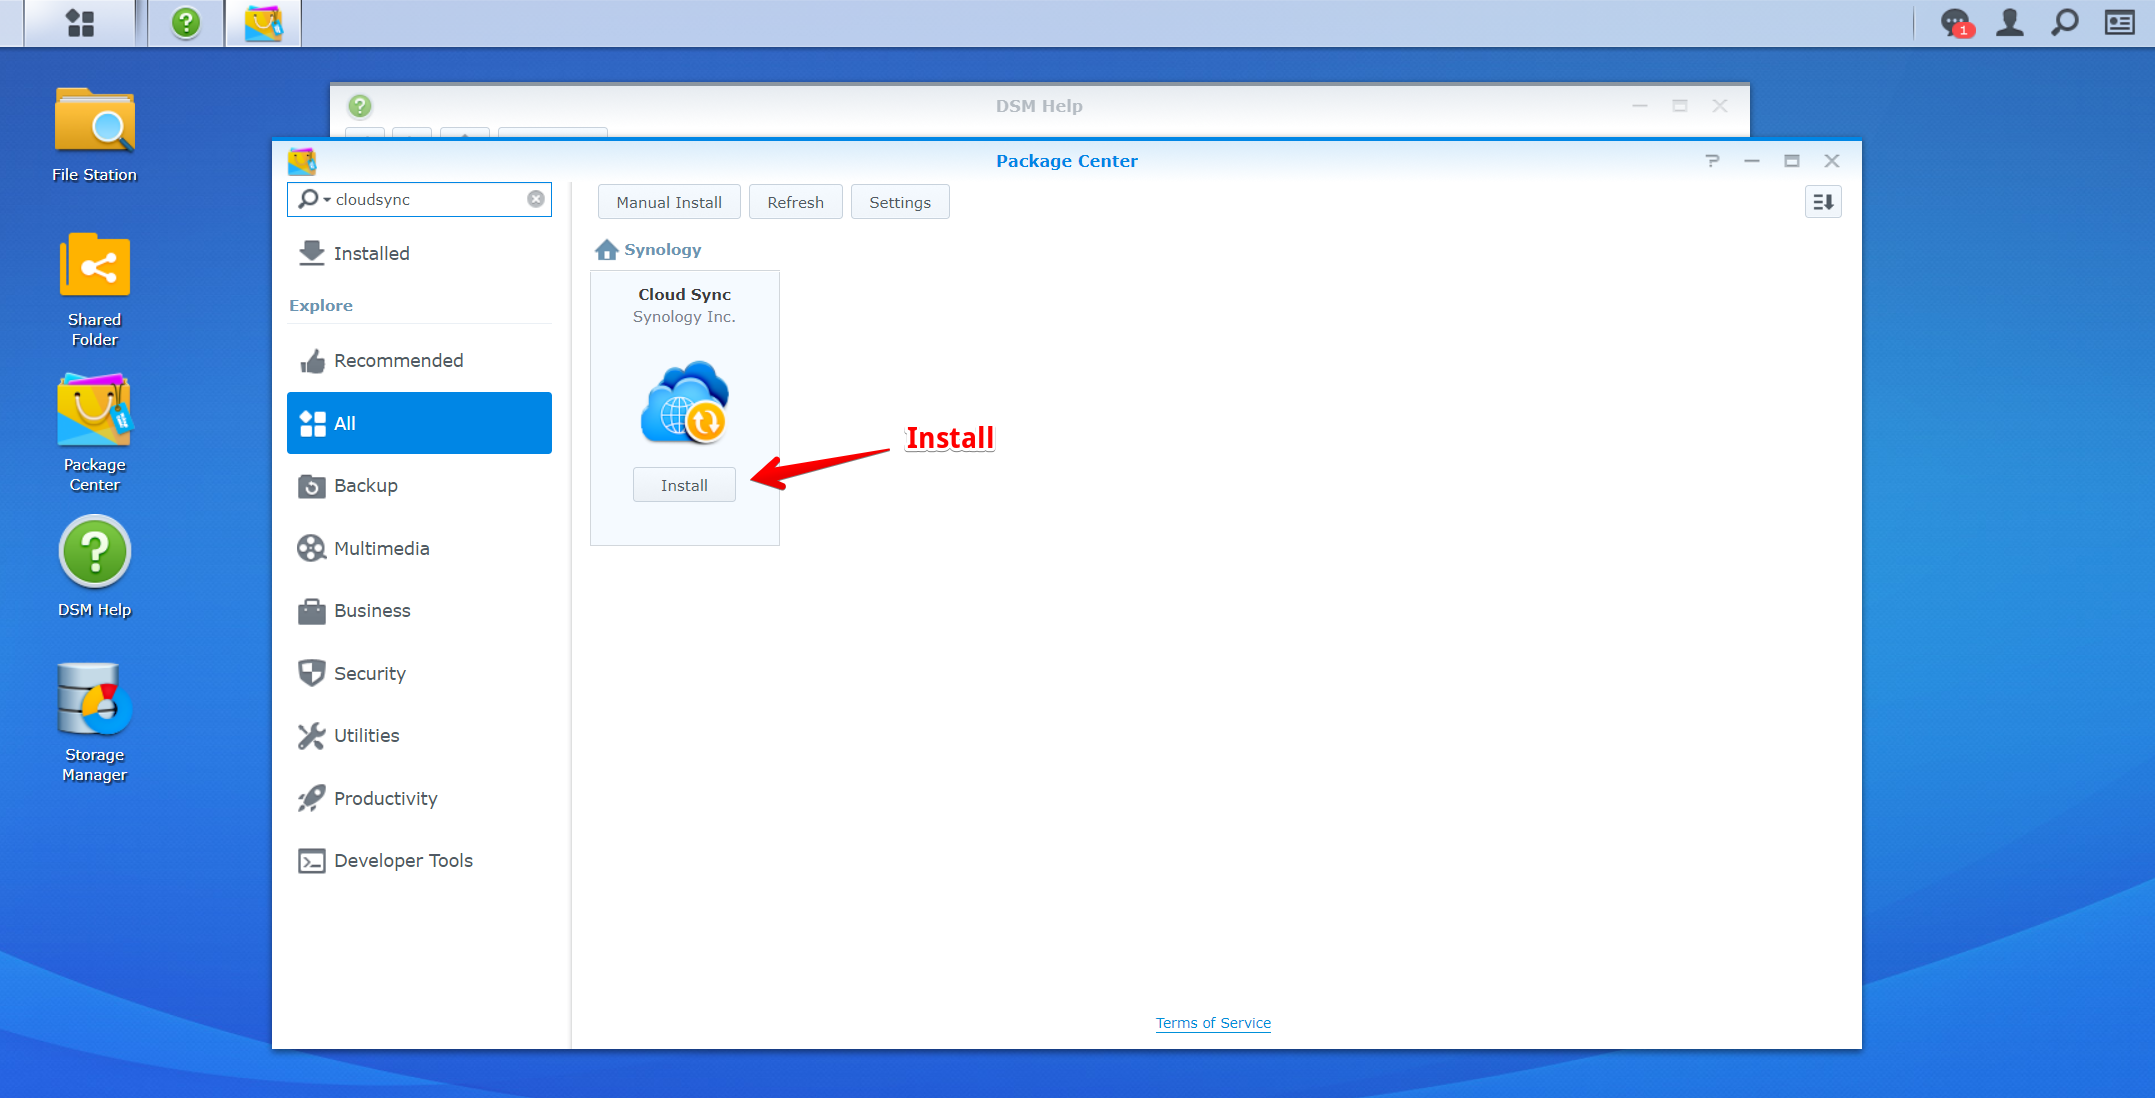
So let’s get started, first we need to install the Synology CloudSync Package, this will allow integration with Backblaze B2. During the installation, it will ask where you would like the packaged to be installed, I just picked ‘volume 1’ as that is where my other packages have also been installed.
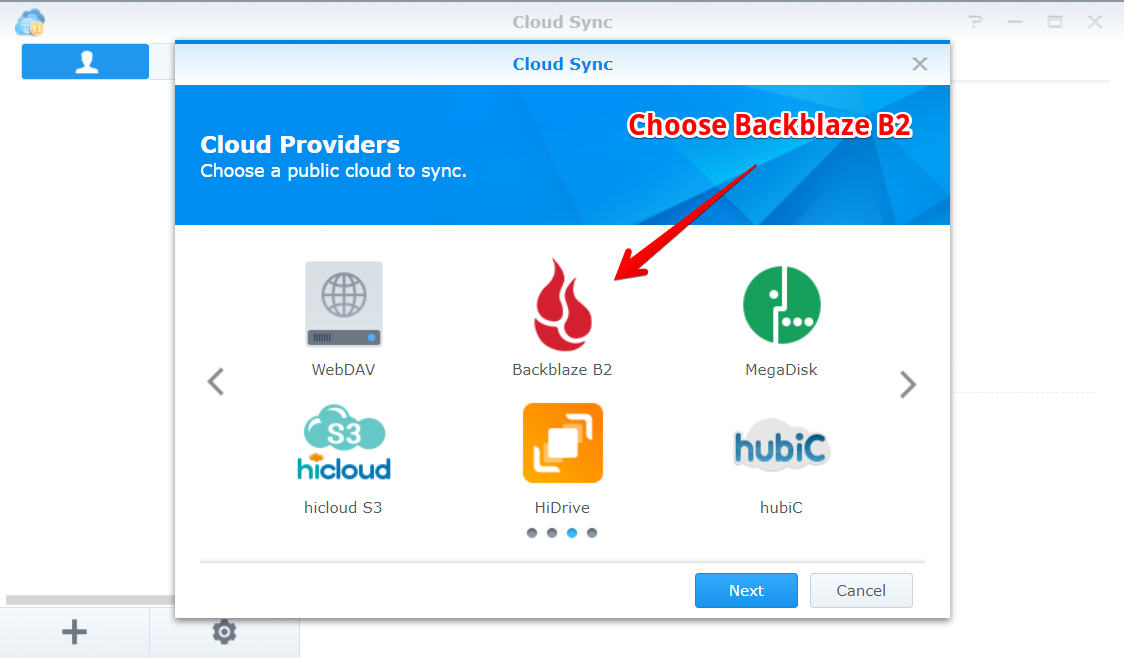
Once CloudSync is installed, the first window that greets us is the ‘Cloud Providers’ menu, As you can guess, we need to select Backblaze B2 which is on the third page.
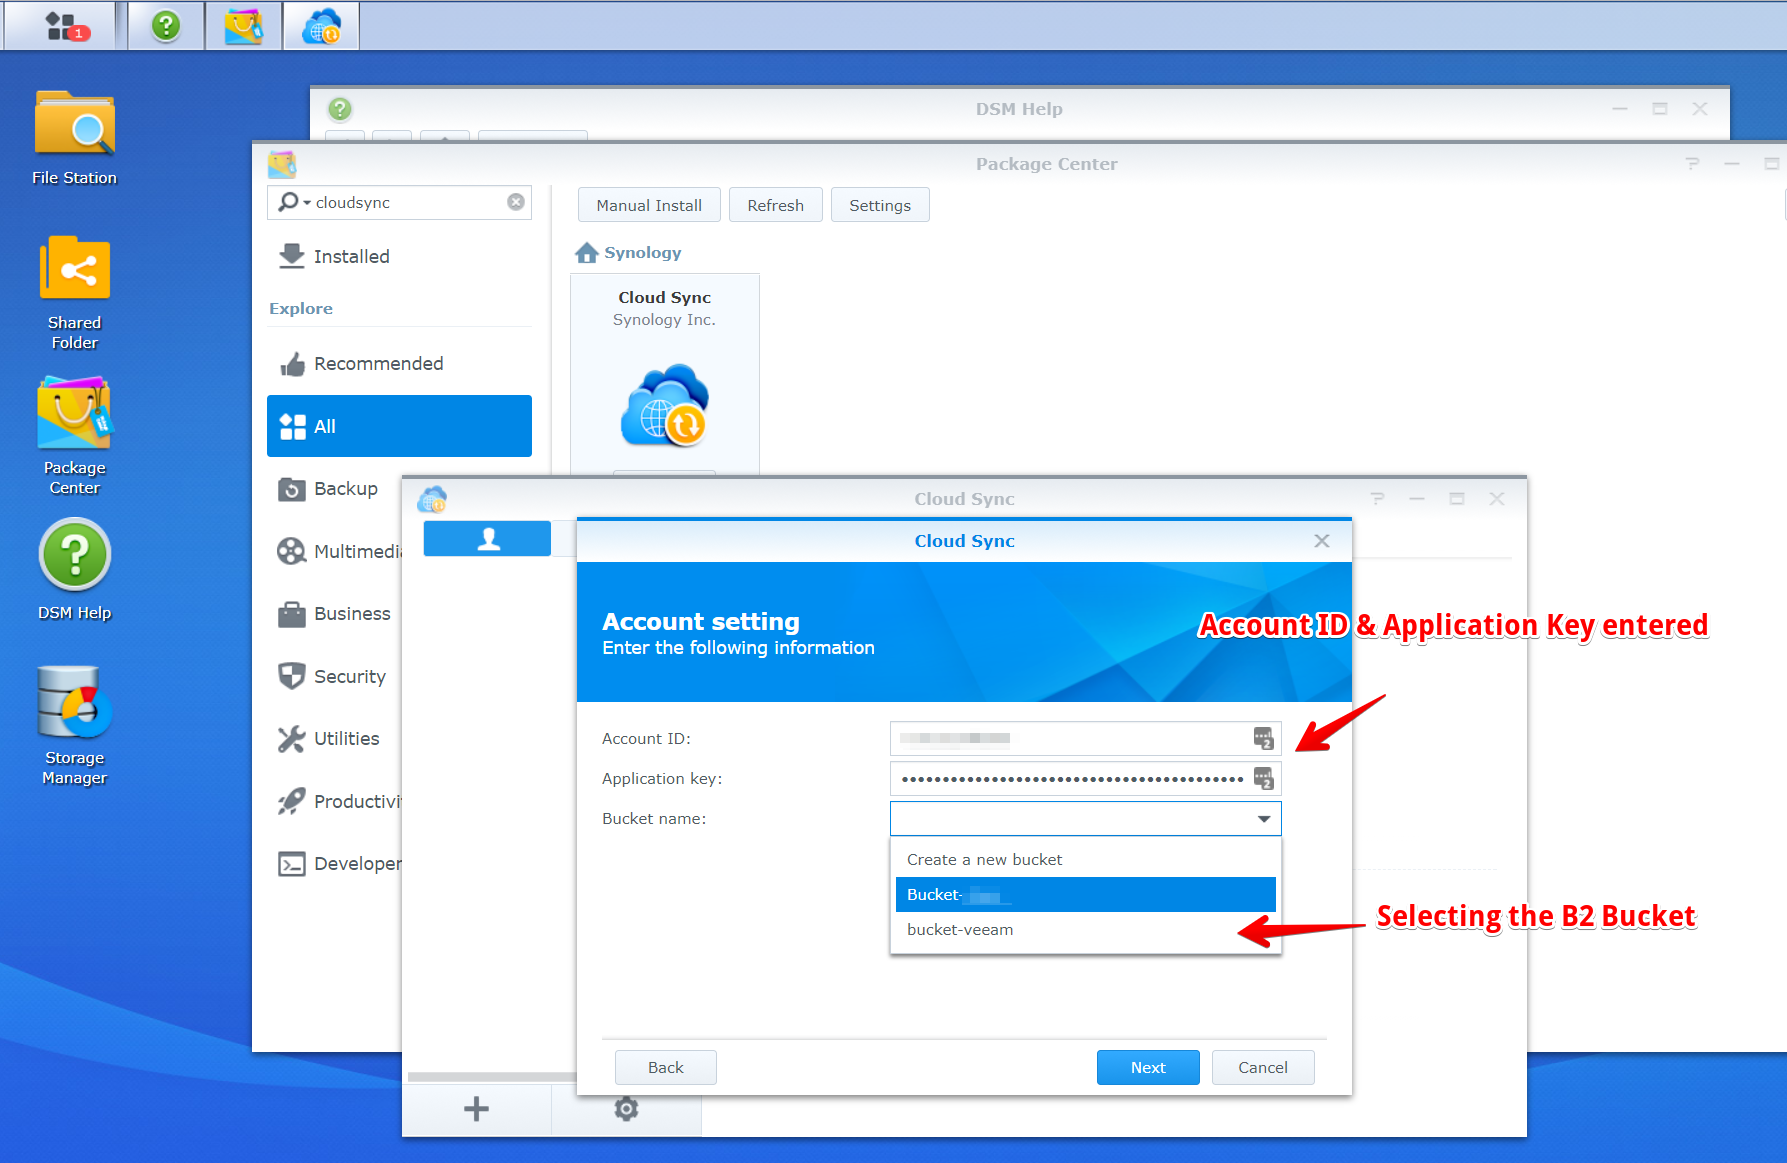
Remember our B2 Bucket, Account ID and Application Key that we created/recorded from Phase 1, we are about to need it. Enter your Account ID, Application Key & select the B2 Bucket we want to use for storing our Veeam backup files.
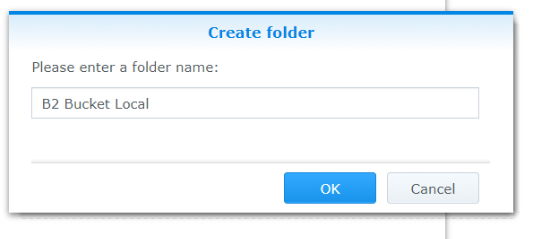
The next step is to configure our local folder used as the source, in my case I created a new folder on an existing SMB share on my Synology NAS.
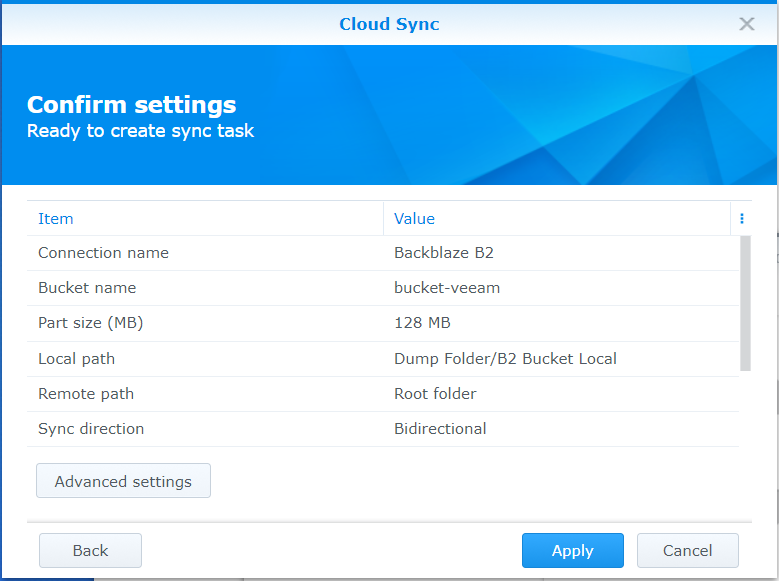
Regarding the part size, it’s more efficient to send larger part sizes but if the link is unreliable then more data will need to be retransmitted if the link drops. In a nutshell, a bigger part size is faster on a fast network… unless the connection breaks. For my testing, I’ve left the part size at 128MB. This setting can be changed at a later date.


Review the summary, in my case I’ve left the sync direction as Bidirectional during testing, if you change this to ‘Upload local changes only’, this would help prevent file deletions being propagated down to your local backup repository from your B2 bucket but you are going to have to manually purge old files from your B2 bucket. This setting can be changed at a later date.
At this stage, we have completed basic configuration of CloudSync integrated with Backblaze B2
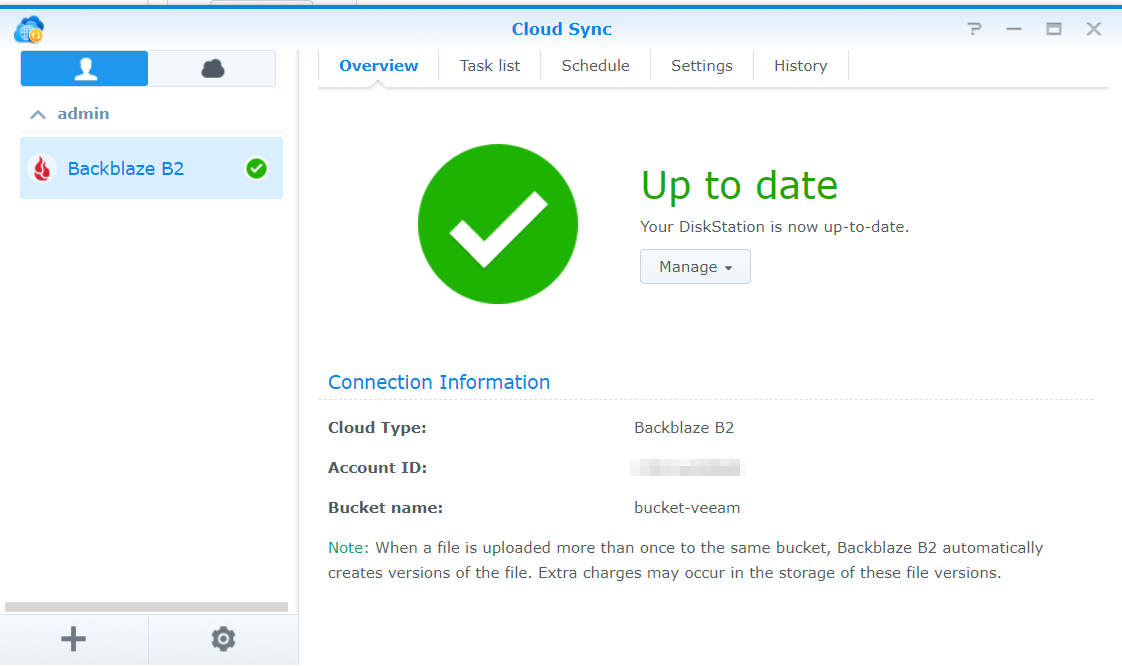
We have configured our CloudSync in Synology and we are now ready to proceed to Phase 3.
wow! I am appreciate to get Install and Configure Synology CloudSync Thanks