I recently had the opportunity to migrate a small regional office from Hyper-V to VMware by leveraging Instant VM Recovery of Workloads to VMware vSphere VMs available in Veeam Backup & Replication v10. With this latest Instant VM Recovery, Veeam can instantly recover any Veeam backup created by any Veeam product to a VMware vSphere VM. In other words, physical servers, workstations, virtual machines or cloud instance Veeam backups can now be restored to VMware. Veeam even handles the P2V/V2V conversion automatically with it’s own built-in logic. How good is that!
To get started, a backup was taken of the source Hyper-V VMs prior to the scheduled outage window. During the outage window, the source Hyper-V VMs being migrated are powered down and the Veeam backup job is run again to ensure all changes to the VM disks have been backed up. Once the backup has completed, the source VM should not be powered on again.
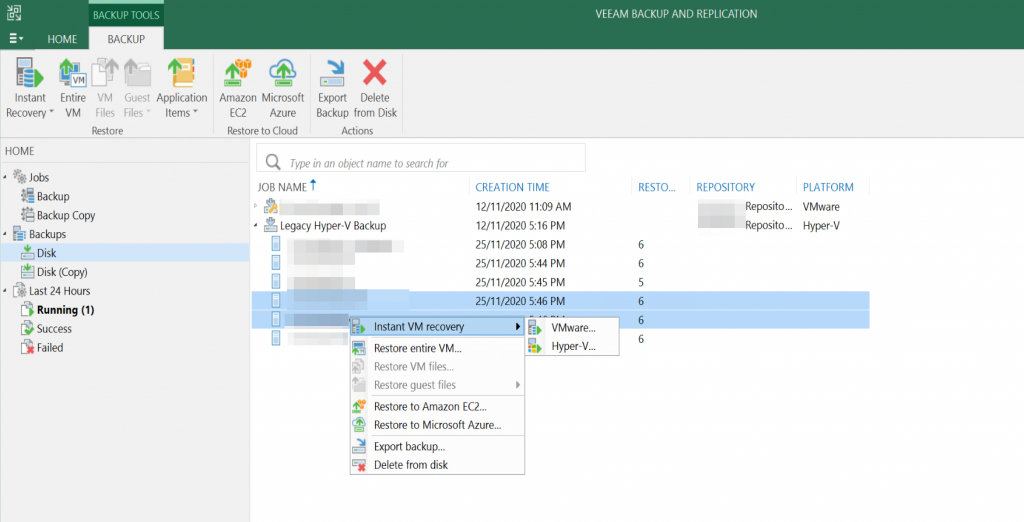
To start the migration process, browse to the backups, right-click the VM to be migrated and click ‘Instant VM Recovery’ then ‘VMware…’
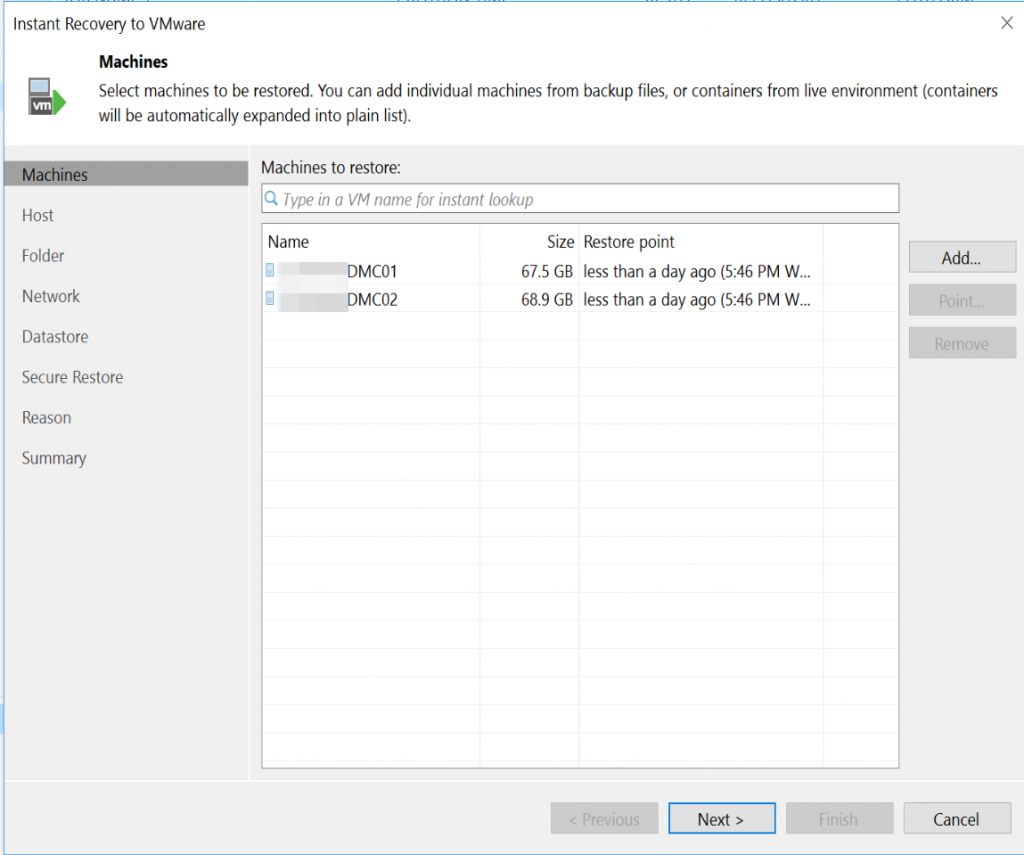
At the next screen, ensure the selected restore point matches the time for when the VM was shut down and the last backup ran.
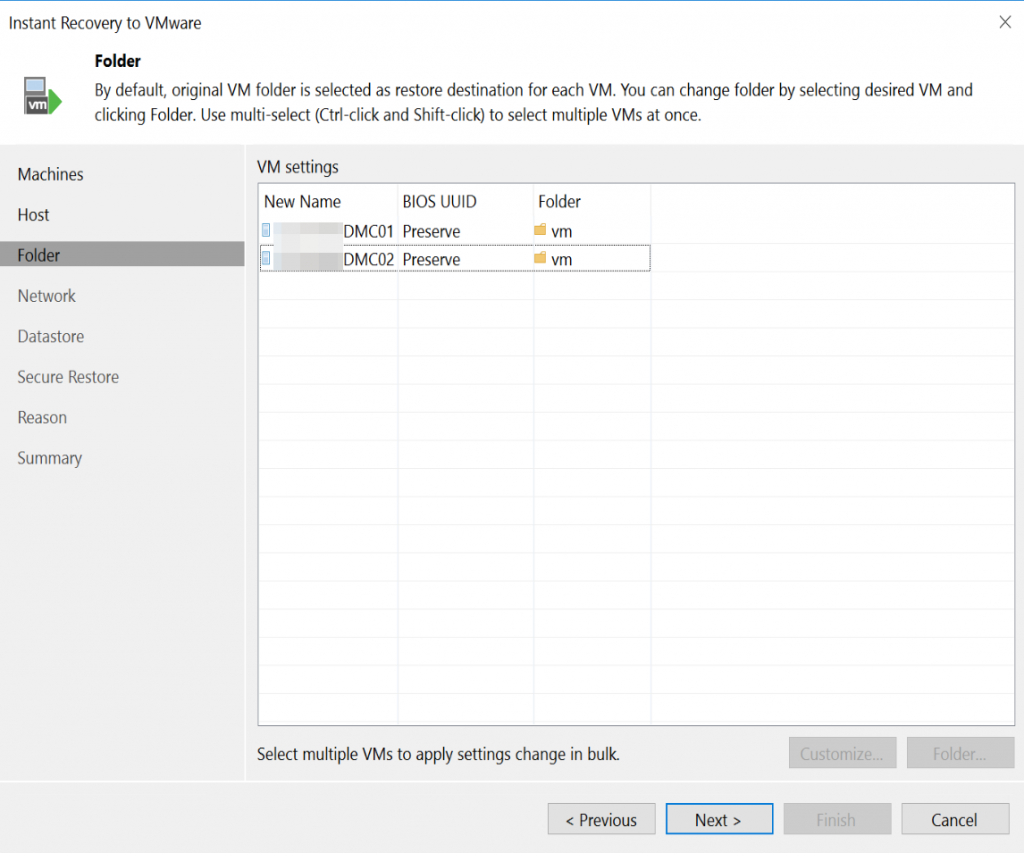
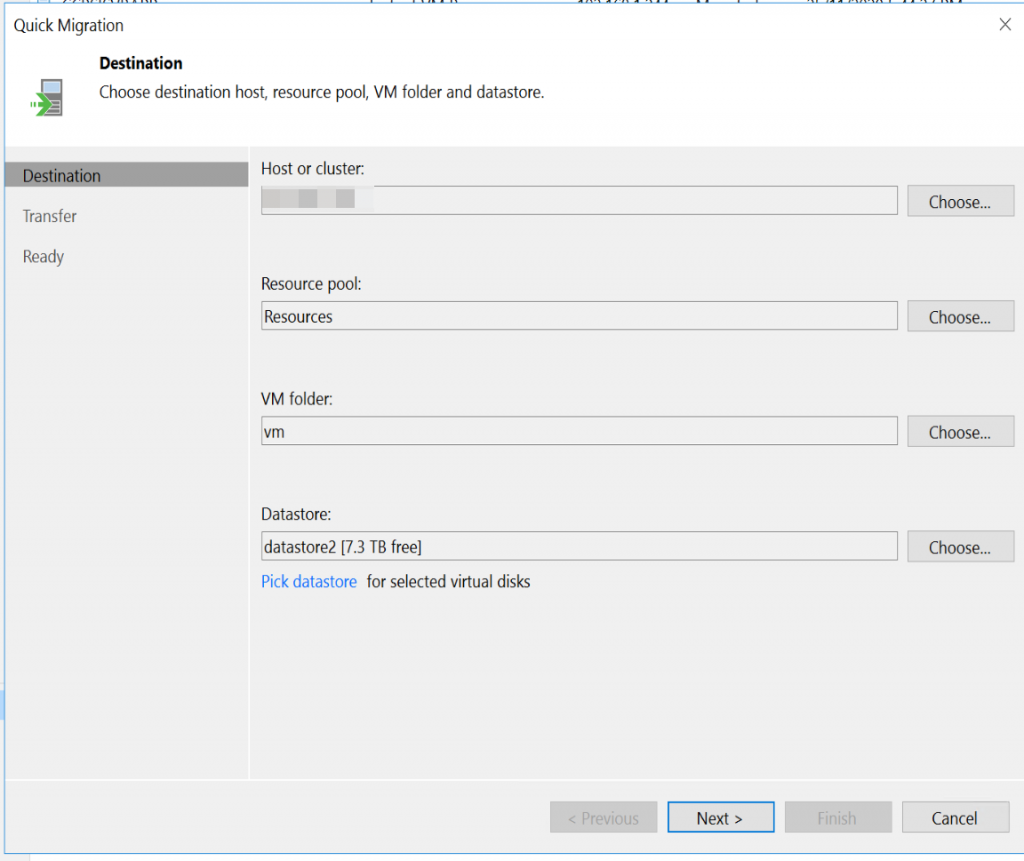
Select a destination folder for the VM.
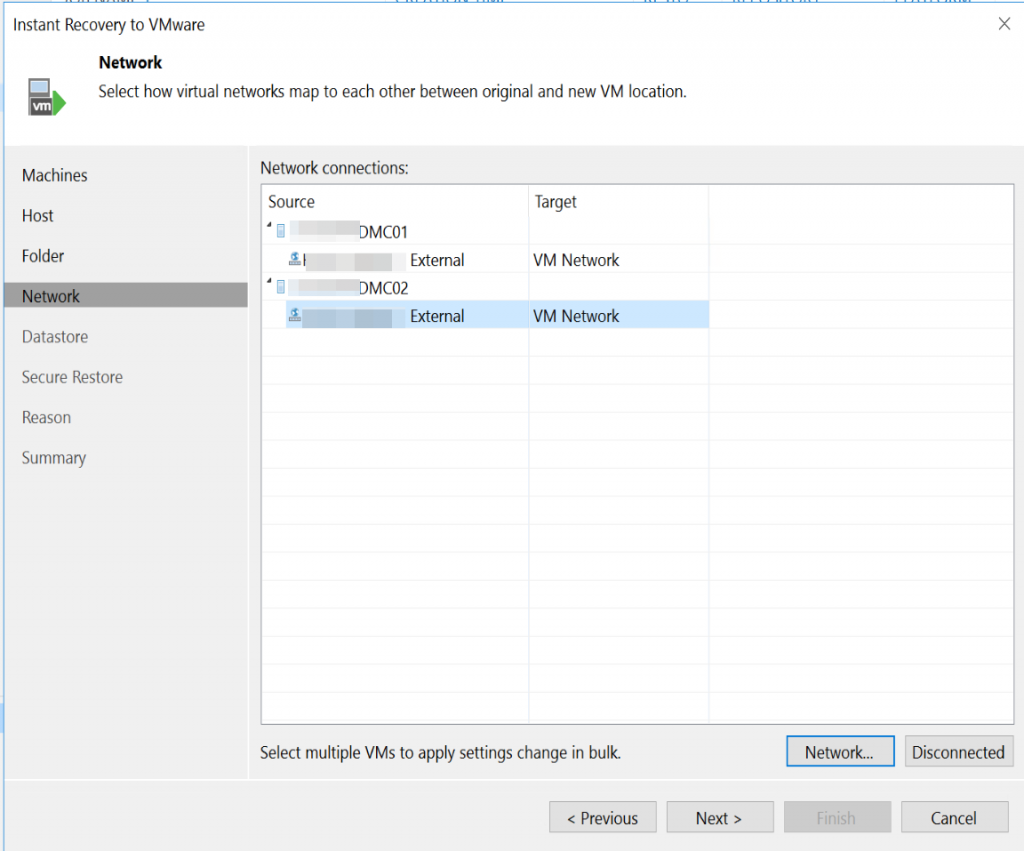
Select the target network appropriate for your environment.
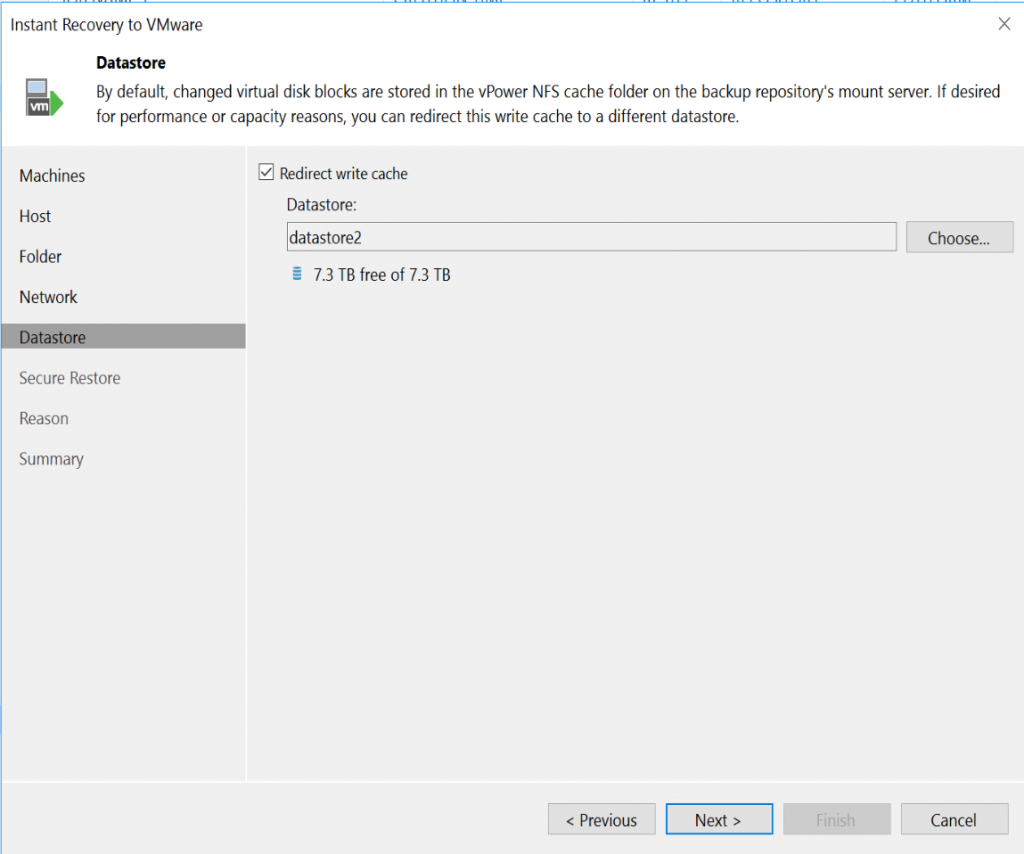
If you plan on powering on the VM before migrating it’s VMDK (storage vmotion) I recommend enabling ‘Redirect write cache’ to improve disk performance.
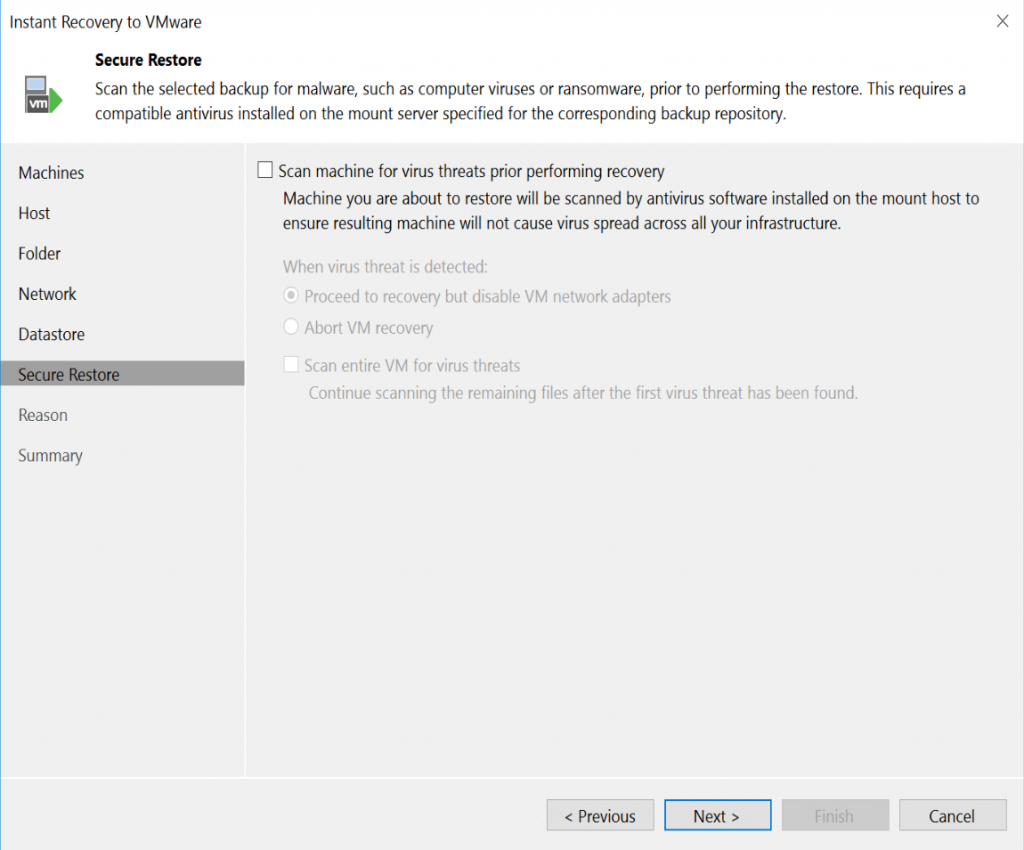
Skip the ‘Secure Restore’ option unless there is concern of malware.
Proceed to summary, I recommend to leave the VM powered off until the VMDKs have been migrated to the production datatores. Click ‘Finish’ to start the Instant Recovery to VMware.
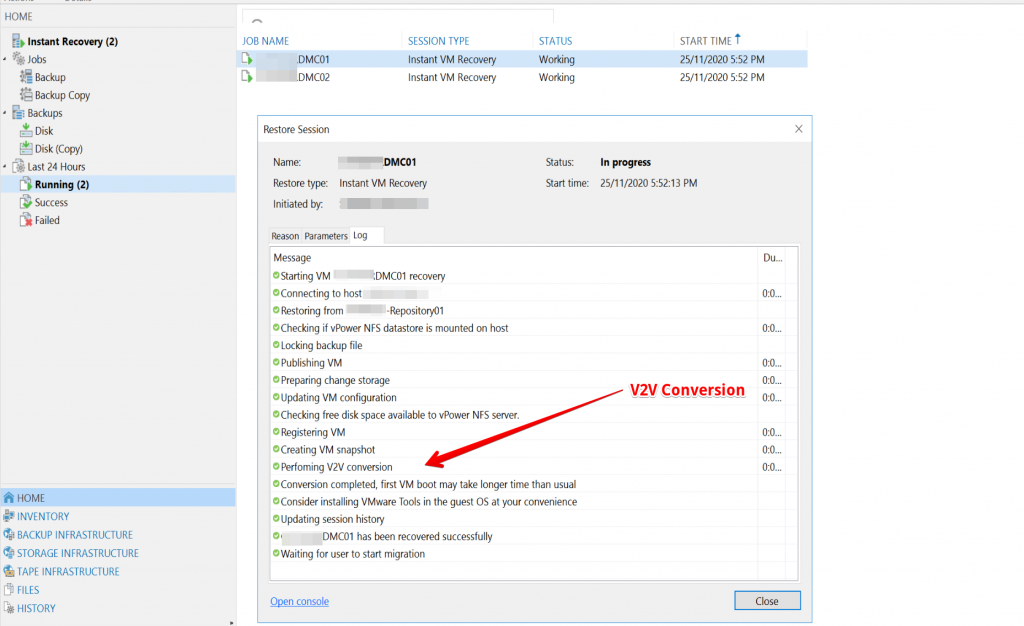
Notice the V2V Conversion action that is automatically performed by Veeam.
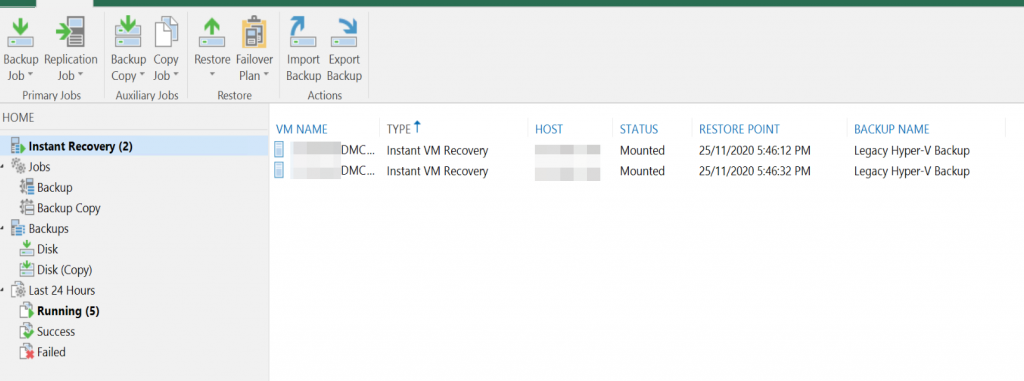
Veeam will show the Instantly Recovered VMs with a status ‘Mounted’.
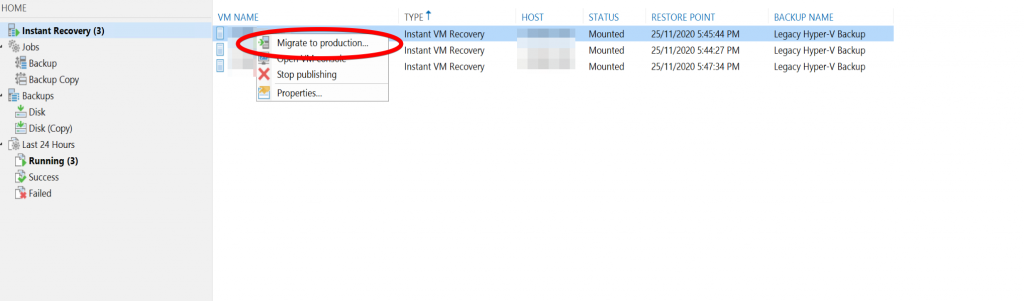
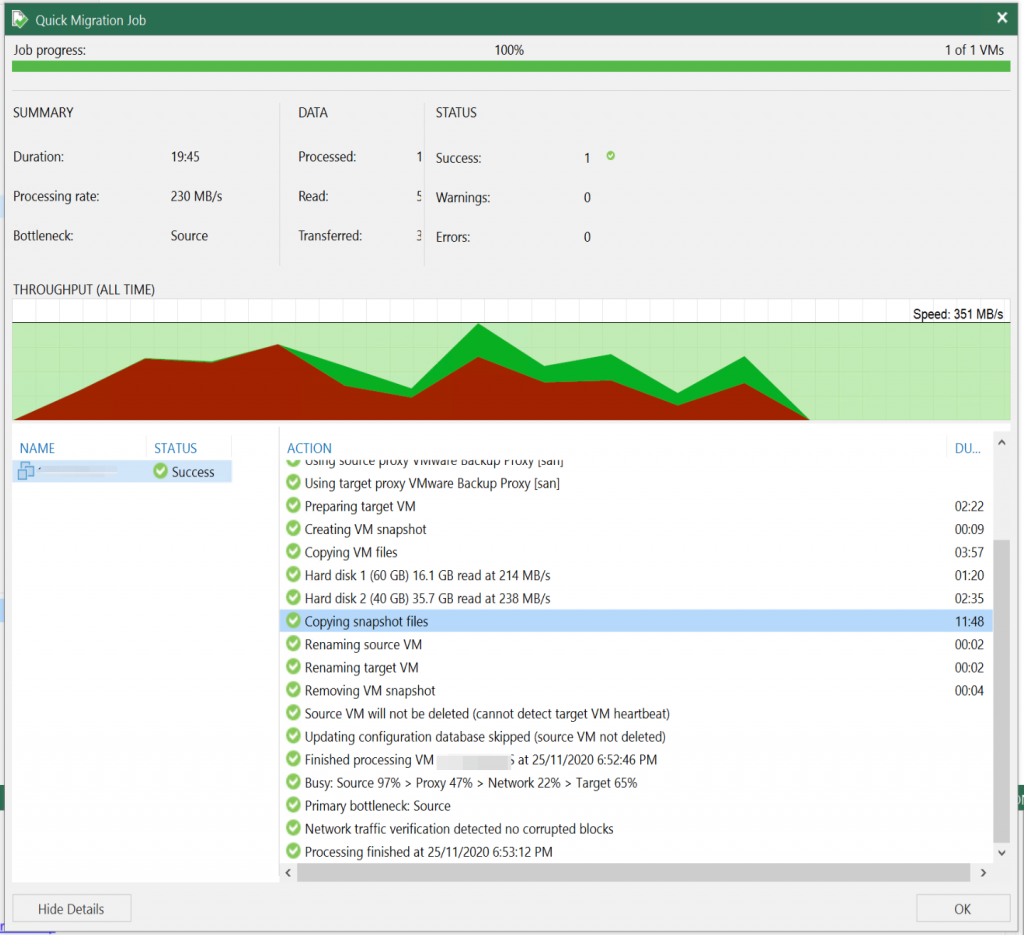
The next step is to perform a ‘Quick Migration’, this will migrate the VMDK from the NFS datastore across to the production datastore.
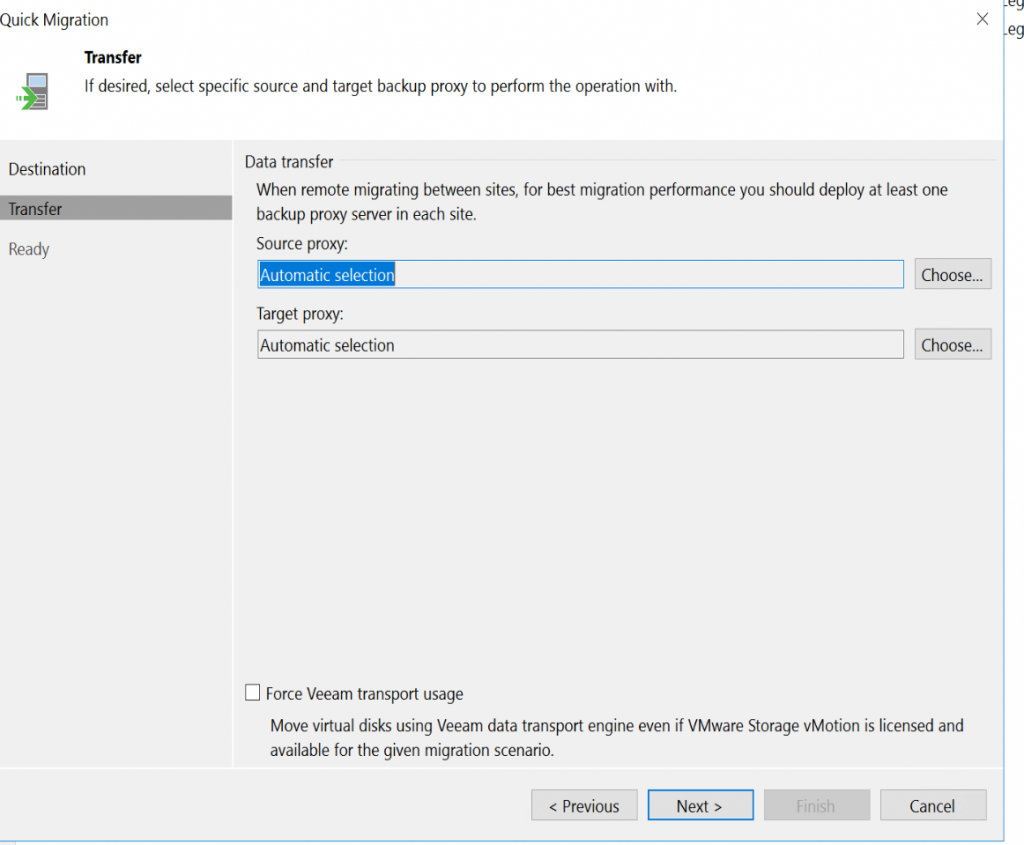
Note: [For Instant VM Recovery finalization] If you migrate VMs to the same datastore cluster that is used as the destination for redirecting virtual disk updates (the Datastore step of the Instant Recovery wizard), you must enable the Force Veeam transport usage check box at the Transfer step of the Quick Migration wizard. Otherwise, your migrated VM may be deleted.
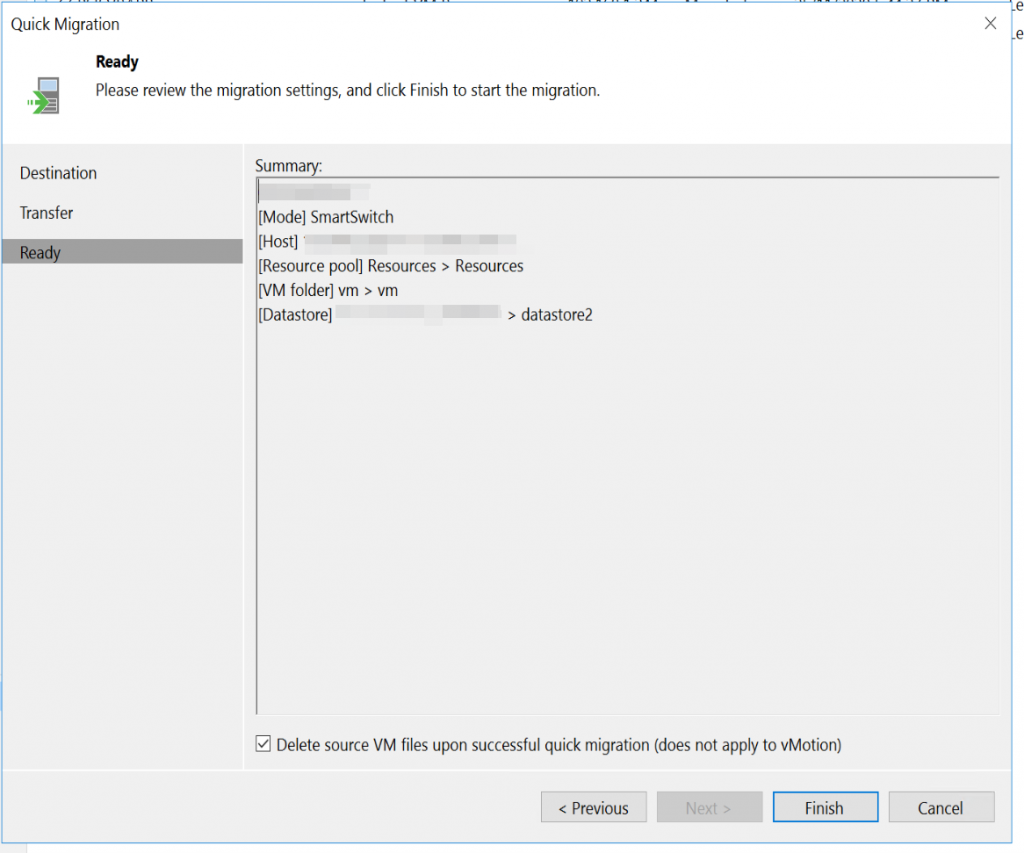
Once the Quick Migration has finished, the VM has been successfully migrated from Hyper-V to VMware and is ready to be powered on and tested.
Great article!
I was wondering if this proces will work the other way around
Have you noticed any performance changes on Hyper-v converted VMs on ESXi host ? Reason asking this question is want to know if it is good idea converting from one platform VM to another does it affect performance on target host, other than recreating from scratch on destination platform.
Thank you.
Hey Bohodir, no negative performance change was observed on the VMs converted to vSphere from Hyper-V. A good performance boost was noticed but this was likely due to the extra resources the new ESXi hosts were configured with.
Hi Rhys,
Thank you for sharing this information.
Do you think this process is ‘better’ than using the VMWare standalone convertor tool? We have access to
both this tool and VEEAM. When using the convertor tool, I found that VMWare tools did not install and we did not have mouse functionality.
Thank you!
I have seen the mouse issue when converting VMWare machines to Hyper-V, but usually on older versions of Windows like 2012R2 or 2008. The fix of installing VMWare tools usually doesn’t work on these instances as it won’t install, like you said.
If you can get logged in, run this command:
setup64.exe /s /v”/qn reboot=n”
Once the command completes, run this command to reboot:
shutdown /r /y /t 0
Hi, many thanks for this great article.